Vegetable Stand
Instructions and photography for the Vegetable Stand is a Do-It-Herself Project from The Home Depot
Cost: $35
Skill Level: Moderate
Tools Used: Circular Saw, Jigsaw, Small Crowbar or Hammer with Claw, Heavy Duty Staple Gun (we used Ryobi 18-Volt ONE+ AirStrike 18-Gauge Cordless Narrow Crown Stapler), Level, Clamps, Carpenter's Square, Measuring Tape, Pencil
Time to Complete: 45 Minutes
Materials:
(1) 1” x 2” x 8’ Common Board (sku 914584; $2.48)
(1) 5.0mm 2’ x 4’ Project Panel Underlayment Board (sku 445789; $5.97)
(1) 18” x 12.5” x 9.5” Large Wood Crate (sku 1000051893; $11.97)
(1pk) 1/4 in. x 5/8 in. x 18-Gauge Crown Staples (sku 1001188154; $8.77)
(optional) Paint or Stain and accessories for application
(optional) Chalkboard paint and chalk for the optional signs
Cut List:
(4) 19”L pieces from the 1”x 2”x 8’ board (side board legs)
(1) 18" x 11-7/8” rectangle piece from the 5.0mm 2’ x 4’ Project Panel Underlayment Board (crate bottom) (optional) (2) 4.75”H x 6”W rectangle pieces from the 5.0mm 2’ x 4’ Project Panel Underlayment Board (chalkboard signs)
Measure and Make Cuts on Cut List:
Measure, mark and cut the 1”x 2”x 8’ board into (4) 19”L sections for the side legs and the 2’ x 4’ Project Panel into (1) 18” x 11-7/8” section to be used as a crate bottom with the circular saw and according to the cut diagram. If you want the optional chalkboard signs for each crate section, cut (2) 4.75”H x 6”W sections from the 2” x 4” Project Panel as well.
Paint or Stain (optional): Paint or stain all wood pieces and wood crate prior to assembly. If using the optional signs, paint those with chalkboard paint.
Remove Bottom Crate Slats and Cut Crate in Half:
Using a small crowbar or the claw side of a hammer, carefully pry the (5) stapled slats from the bottom of the Large Wood Crate being careful not to damage them as they will be reattached. Set the (5) slats aside. Using a jigsaw, cut the large crate horizontally in half in between the two middle slats being careful not to cut any of the slats. The cut should be approximately 4.75” up from the bottom of the crate. You should now have two bottomless half crates, one with handles and one without. Continuing with the jigsaw, cut any overhang from the solid end pieces so that the end pieces are flush with the slats.
Attach the Crate Bottoms and Side Board Legs:
Reattach the (5) slats that were previously removed to the bottom of the half of the crate with handles using the heavy duty stapler. This will be the upper crate of the produce holder. Take the half of the crate without handles and attach the 18" x 11-7/8” rectangle piece cut from the 2’ x 4’ project panel board using the heavy-duty stapler. This will be the lower crate of the produce holder. Continuing with the heavy-duty stapler, first attach the (4) 19” side board legs to the outside of the two solid ends of the upper crate, using two legs on each solid end. Be sure the legs are flush with the top and sides of the crate. Next, measure 3” up from the bottom of the (4) side board legs and make a mark. Align the bottom of the lower crate with the 3” marks on the legs and attach the legs to the outside of the two solid ends of the lower crate, making sure to keep the legs flush with the sides of the lower crate. TIP: Use clamps and a level to help keep the crates level while stapling the legs. Attach the optional chalkboard painted 4.75”H x 6”W signs centered horizontally on the slatted sides of each crate with the stapler.
Rustic Wheelbarrow
Instructions and photography for the Rustic Wheelbarrow is a Do-It-Herself Project from The Home Depot
Cost: $55
Skill Level: Intermediate
Tools Used: Circular Saw, Jigsaw, Drill 1/2" Drill Bit, Measuring tape or Carpenter's Square, Pencil, Safety Goggles, Sand Paper or Sander
Time to Complete: 45 Minutes
Materials:
(1) Crates and Pallet 18" x 12-1/2" x 9-1/2" Large Wood Crate (1000051893; $11.97)
(1) 2" x 8" x 8' #2 Prime Kiln-Dried Southern Yellow Pine Lumber (689238; $5.71)
(3) Pressure-Treated 36" x 2" x 2" Wood Square End Baluster (430792; $0.77 ea x 3 = $2.31)
(1) 1/2" x 48" Wood Round Dowel (148159; $1.72)
(1 box) #8 x 2-1/2" Phillips Square Drive Flat-Head Full Thread Zinc Coated Multi-Material Screw [20 per Box] (571212; $1.98)
(1 pack) #8 x 1" Flat-Head Philips Wood Screws [12 per pack] (285103; $1.18) (optional) Paint or stain
Cut List:
(2) 8" segments cut from one of the Pressure-Treated 36" x 2" x 2" Wood Square End Baluster - Legs
(1) 3.75" segment from the 1/2" x 48" Wood Round Dowel - Wheel Axle
(1) 7" circle cut from 2" x 8" x 8' board - Wheel
Measure and Make Cuts on Cut List:
Measure, mark, and make all of the cuts on the cut list according to the cut diagram. Use a circular saw to cut the two 8” legs from one 36” x 2” x 2” Wood Square End Baluster and the 3.75” Wheel Axle from the 1/2” x 48” Wood Round Dowel. For the 7” Wheel, make a mark in the center of the 2” x 8” x 8’ board about 6” in from the end of the board. Screw one screw halfway into the center mark and wrap a string with one end tied around the screw head and the other end tied around a pencil with 3-1/2” of string between the nail and the pencil and draw the 7” circle. Use a ½” drill bit to drill a hole touching the line of the circle on the outside of the line and then insert a jigsaw into the hole to finish cutting along the outline of the circle. OPTIONAL: Smooth any rough ends with sandpaper or sander.
Drill Holes for Wheel Axle:
Measure and mark the center of both remaining 36” x 2” x 2” Wood Square End Balusters at 1-1/4” from the ends. Using the ½” drill bit, drill a 1/2” hole halfway through the baluster at the center mark of each of the balusters using a slight 5° angle and the drill bit pointing away from short end of the baluster. See diagram.
Drill a 1/2" hole through the center mark of the 7" Wheel.
Attach Balusters to Crate and Wheel
Turn Large Wood Crate upside and align one of the Balusters over the bottom of the crate so that the end of the Baluster with the drilled hole overhangs the end of the crate by 6” and is centered over the second slat on that side while the other end of the Baluster is angled to hit in between the two outermost slats on the other end of the crate, allowing a 12” overhang on that side to act as a handle. Secure Baluster to the bottom of crate using a 2-1/2” screw on each end.
Insert the 3.75” Wheel Axle into the drilled hole on the secured Baluster, slide 7” Wheel onto Wheel Axle, and insert Wheel Axle into the remaining Baluster. With the wheel sandwiched securely between the two Balusters, secure the remaining Baluster to the bottom of the crate centered over the second slat at the wheel end and between the two outermost slats at the handle end using 2-1/2” screws at each end.
Attach Legs
Place the two 8” Legs vertically 3/4” in from the end of the crate on the outside of the Balusters. Secure with one 2-1/2” screw through the Balusters. Turn Wheelbarrow over and secure the legs through the slat on the inside bottom of the crate using one 1” screw into each leg.
Paint or Stain and Finish (optional): Paint or stain and polyurethane especially if using outside.
Kitchen Island
Vegetable Crate Stand
Crate Bar
Industrial Crate Side Table
Crate Purse Storage Shelf
Box Crate
Crate Bench
Instructions and photography for the Crate Bench is a Do-It-Herself Project from The Home Depot
COST:
Total cost without optional wood glue is $51.66; with wood glue is $54.63. These are based on market pricing in Atlanta, GA and do not include tax.
SKILL LEVEL:
Intermediate
TOOLS USED:
Circular Saw, Drill, Carpenter’s Square, Measuring tape, Pencil
TIME TO COMPLETE:
45 minutes to an hour
MATERIALS:
(2) Large Crates & Pallet Wood Crates (2 at $11.97ea = $23.94, 1000051893)
(1) 1”x12”x8’ Common or Pine Board ($18.35, 458538 Common Board; FYI – Pine Board in this size is only $9.96, sku 1000019784, but is not available in all stores in Atlanta, so unsure availability nationwide.)
(1) 1”x4”x6’ Common Board ($3.47, 914673)
(16) #10 x 1-1/4” Wood Screws (2pks at @$1.18ea = $2.36, 378312)
(16) #8 x ¾” Wood Screws (2pks at @$1.18ea = $2.36, 284683)
(2) #8 x 2” Wood Screws ($1.18 per pack, 382495)
(optional) Wood Glue (8oz $2.97; 676828)
(optional) Paint or Stain and accessories for application
CUT LIST (see Cut Diagram):
(4) 17.25”L x 3.5”W from the 1”x 4”x 6’ board (legs)
(1) 36”L x 11.5”W from the 1”x 12”x 8’ board (bottom board)
(1) 37.5”L x 11.5”W from the 1”x 12”x 8’ board (top board)
(1) 9.5”L x 4”W from the 1”x 12” x 8’ board (support)
MEASURE AND MAKE CUTS ON CUT LIST
The short and sweet version: Measure, mark and cut the two boards according to the cut diagram. TIP: From the 1”x 12”x 8’ board, it’s easiest to cut out the top and bottom boards prior to cutting the support piece.
The longer version: Step 1: On the 1”x 4”x 6’ board, measure and mark 4 sections of the board at 17.25” each for the legs (see diagram). Set aside. Step 2: On the 1” x 12” x 8’ board, measure and mark one section of the board at 37.5” x 11.5” for the top board, one section at 36” x 11.5” for the bottom board, and one piece at 9.5” x 4” for the support (see diagram). Step 3: Use a circular saw to make the cuts at the measured marks for the 4 legs, top board, bottom board, and support piece. TIP: It’s easiest to cut out the top and bottom boards prior to cutting the support piece.
PAINT OR STAIN (optional)
Paint or stain all wood sections and the two large crates prior to assembly
INSTALL MIDDLE SUPPORT
Pre-drill two holes at the 18” center of the bottom board, one 3” from the edge and the next one 3” from the first.
Use a bead of wood glue (optional) along the 9.5”L edge of the support piece and align pre-drilled holes in the bottom board on top of the support piece, ensuring that the end of the support piece is flush with the edge of the bottom board. TIP: Push the 2” wood screws through the pre-drilled holes, align the 9.5”L edge of the support piece flush with the edge of the bottom board and centered over the two screws, and push the support piece down onto the screws to make an indention mark into the support piece. Drill a ¼” deep starter hole in the support piece where the indention marks are to help as guides when installing the support piece beneath the bottom board.
Drill 2” wood screws through the pre-drilled holes in the bottom board and into the support piece aligned below.
ASSEMBLE BENCH
TIP: Pre-drilling holes in the crate slats will help keep the wood slats from splitting.
Turn the two large crates slat side down and attach them side by side in the center using 1 ¼” wood screws in each of the four corners.
Align back of crates with the edge of the bottom board and use a ¾” wood screw in the bottom corners of each crate to attach the crates to the bottom board.
Attach legs to the outside of the bench ends with 1-1/4” wood screws in each of the inside crate corners. Use two legs on each side of the bench and ensure legs are flush with the left and right edges of the crate ends.
Place top board on top of crates and attach from inside of the crate using ¾” wood screws in each corner.
Wine Crate Cut
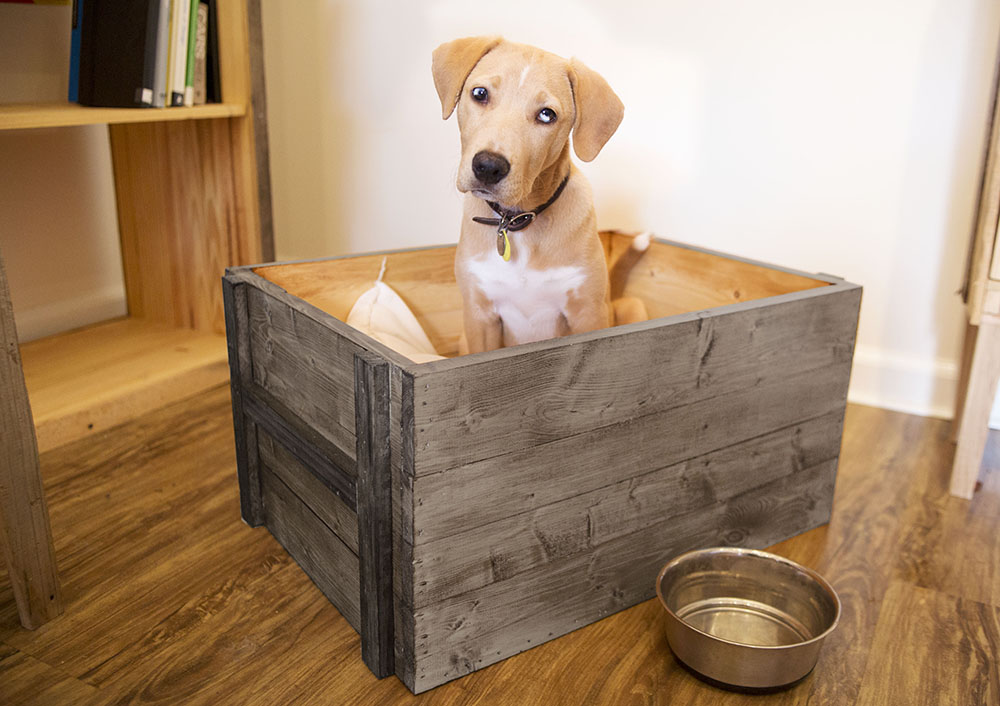
This easy DIY wine bottle crate holds up to 12 bottles of wine, making it the perfect gift for the wine lover on your list. By making a few simple cuts in a piece of 3/16” plywood using the Ryobi One+ circular saw, jigsaw, and sander tools, and inserting the cut panels into a Crates and Pallet Large Wooden Crate from homedepot.com, the wine bottle crate will be ready for a bow and under the tree in about 45 minutes. Leave it unfinished or dress it up with paint or stain, and add a bottle or two of their favorite vintage for a personal gift that will be sure to please.
Time to complete:
45 minutes
Tools Used:
Ryobi One+ Circular Saw
Ryobi One+ Jigsaw
Ryobi One+ Sander
Measuring Tape
Straight Edge
Pencil
Materials used:
(1) Crates & Pallet Large Wooden Crate (homedepot.comm sku 203153338)
(1 sheet) 3/16" birch plywood
(1 qt) Varathane Wood Stain in Kona (optional)
(1 qt) Varathane Polyurethane in Clear Stain (option)
Printed templates on 11" x 17" paper (optional)
Templates
(Print on 11" x 17" paper for correct scale)
Steps:
Note: Templates have been provided for steps 1-4 as a shortcut. The templates will need to be printed on 11" x 17" paper for the correct scale.
Step 1: Cutting along the wood grain of the 3/16” plywood, use the Ryobi One+ circular saw to cut two rectangles measuring 16-1/2”W x 9-1/4”H. Set aside.
Step 2: Continuing to cut along the wood grain, use the Ryobi One+ circular saw to cut three more rectangles from the 3/16” plywood measuring 11-7/8”W x 9-1/4”H.
Step 3: Using the two larger rectangles from Step 1 and measuring along the longest side, from the shorter edge, measure over 3-15/16” and make a mark. From there, measure 4-3/4” vertically and draw a straight line up. From there, measure over 1/4" and draw a horizontal line. Then draw a straight line back down to the edge of the panel. Draw two more inserts each 3-15/16” apart. Draw the 3 inserts on both of the longer panels and cut the 3 inserts out of each panel using a Ryobi One+ jigsaw. Sanding with the grain, use the Ryobi One+ sander to smooth any edges or splintering caused by the saw cuts.
Step 4: Using the three smaller rectangles from Step 2 and measuring along the longest side, from the shorter edge, measure over 3-15/16” and make a mark. From there, measure 4-3/4” vertically and draw a straight line up. From there, measure over 1/4" and draw a horizontal line. Then draw a straight line back down to the edge of the panel. Draw one more insert 3-15/16” apart from the first. Draw the 2 inserts on all 3 of the shorter panels and cut the 2 inserts out of each panel using a Ryobi One+ jigsaw. Sanding with the grain, use the Ryobi One+ sander to smooth any edges or splintering caused by the saw cuts.
Step 5: Interlock the two larger rectangles with the three smaller rectangles where the inserts were cut in order to form a grid design.
Step 6: Push the entire interlocking grid inside of the Crates and Pallet Large Wooden Crate.
Step 7: (Optional): Paint or stain the wine bottle crate for a customized look.
The pictured wine bottle crate was stained with Verathane Wood Stain in Kona and then coated with Verathane Polyurethane in clear satin. Paint the stain on and then immediately wipe off with a sponge. Let stain dry and finish with a coat of the clear satin polyurethane.
Crate Desk
With the crate handle side towards the ground (crate is vertical), attach 4 pieces of wood (9" x 0.75" x 0.75") to the slatted inside of a second Large Crate. Set these two Step 1 Large Crates aside. See attached image for placement and spacing
Create front half of the Crate Base.
Attach one of the vertical Large Crates from Step 1 on top of and aligned to the far right of one of the Large Crates with bottom slats removed from Step 2 making sure that the Step 2 Large Crate with bottom slats removed is horizontal while the Step 1 Large Crate is vertical on top. Use (4) 1" wood screws in each of the four corners to attach the two crates together. Attach the other vertical Large Crate from Step 1 on top of and aligned to the far left of the second Large Crate with bottom slats removed from Step 2 making sure that the Step 2 Large Crate with bottom slats removed is horizontal while the Step 1 Large Crate is vertical on top. Use (4) 1" wood screws in each of the four corners to attach the two crates together. Set the front half of the Crate Base aside. See attached image.
Create back half of the Crate Base.
Attach another Large Crate vertically on top of an aligned to the far right of another Large Crate that is resting horizontally. Use (4) 1" wood screws in each of the four corners to attach the two crates together. Repeat with an additional vertical Large Crate attached on top of and aligned to the far left of another Large Crate that is resting horizontally. Use (4) 1" wood screws in each of the four corners to attach the two crates together. See attached image.
Line up the two far right aligned crate bases making sure the front half Crate Base from Step 3 is open and outward facing, and the back half of the Crate Base from Step 4 has the slatted side facing outward on the back side. Using the wood cuts (18.5" x 1.75" x 0.75"), attach the two base halves together along the inside of the bottom two horizontal crates with (4) 1" wood screw screwed into each of the two pieces of wood. Line up the two far left aligned crate bases. making sure the front half Crate Base from Step 3 is open and outward facing, and the back half of the Crate Base from Step 4 has the slatted side facing outward on the back side. Using the wood cuts (18.5" x 1.75" x 0.75"), attach the two base halves together along the inside of the bottom two horizontal crates with (4) 1" wood screw screwed into each of the two pieces of wood. See attached image.
Align and space the set of Crate Bases about 4' apart. See the attached image.
Attach the 2' x 4' piece of plywood or other wood species (or whatever other material of your choice) to the top of the two Crate Bases to form the top of the desk. Use (4) 1" wood screws along each 2' side of the desktop board to secure into the Crate Bases. Set Crate Bases with attached desk top aside. See attached image.
Find the center and drill appropriate sized holes for the drawer pull or knob that will be installed on the slatted side of each of the (6) Small Wood Crates. See attached image.
Center and attach the drawer pull or knob to the slatted side of each of the (6) Small Wood Crates using hardware included with drawer pull or knob selected. See attached image.
Slide the (6) Small Crates into the (2) Step 1 Large Crates that make up the Crate Base. See attached image.
Leaning Crate Shelf
What you will need:
STEP 1: Cut the 2 side boards as shown.
STEP 2: Mount the first crate 4" inches down one side board so that the bottom of the crate and ground are parallel.
STEP 3: Mount the remaining crates to the side, and then mount the other side board to the crates.
STEP 4: Finally, attach the top board by screwing through the top board at an angle into the side boards.


